Space-Efficient Kitchen Designs: Complete Guide
Discover expert tips for designing a functional van kitchen, from layout planning to material selection. Learn proven strategies for maximizing space and creating an efficient cooking setup in 2024.

Would you believe that 87% of van dwellers consider their kitchen setup the most crucial part of their build? When I first started van life, my “kitchen” consisted of two cooler bags tossed in the back. Let me tell you – that didn’t last long! After three complete kitchen rebuilds and countless modifications, I’ve learned exactly what makes a van kitchen truly work. Whether you’re planning your first build or looking to upgrade, I’m excited to share the practical insights that transformed my mobile cooking experience.
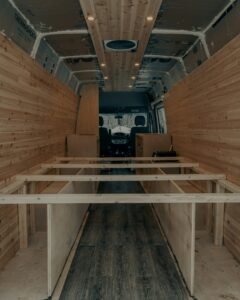
Looking back at my first kitchen attempt makes me chuckle – everything was just placed wherever it seemed to fit! Now I know better. A functional van kitchen revolves around three essential zones: preparation, cooking, and storage.
The prep zone is truly the heart of your kitchen. After too many cramped cooking sessions, I finally dedicated 24 inches of uninterrupted counter space at standard height (36 inches). It might seem like a lot in a van, but trust me – it’s worth every inch! One of my favorite hacks was adding a bamboo cutting board that fits perfectly over my sink, instantly doubling my prep area when needed. If you’re looking for DIY van kitchen inspiration, check out this guide from Far Out Ride for practical layouts and ideas.
My cooking zone went through several iterations. Initially, I installed this massive propane stove that ate up way too much space and fuel. These days, I run a dual system: an induction cooktop for quick meals and a compact propane stove as backup. It’s the perfect balance of efficiency and flexibility. If you’re unsure which cooktop is best, I highly recommend this comparison of the best induction cooktops for van life to help you choose.
The storage zone? That was definitely my biggest challenge. Through trial and error, I’ve developed a system that actually works: upper cabinets with positive-latching doors, pull-out pantry drawers with adjustable dividers, and vertical space maximizers like magnetic knife strips and spice racks. Every inch serves a purpose!
Want to know the real secret to van kitchen success? It’s all about vertical space! I’ve installed ceiling-mounted storage nets for lightweight items and created “zones” on my walls using various organizers. The key is making everything accessible without creating visual clutter.
Choosing the right materials made a huge difference in my latest build. My butcher block countertop has survived countless adventures and still looks great with occasional refinishing. The stainless steel sink has proven to be the perfect balance of durability and weight. If you’re installing a sink, this step-by-step guide is a lifesaver!
One lesson I learned the hard way: drawer slides matter! After dealing with rusty, sticky drawers for months, I invested in quality aluminum slides. They’re still working smoothly after two years of bouncing down dirt roads.
Let’s talk about something that often gets overlooked – safety features. After a small grease fire in my second build (scary moment!), I made sure my current setup has all the essentials: an ABC fire extinguisher within easy reach, smoke and carbon monoxide detectors, and a propane detector for vans near floor level. I also maintain a clear path to the doors – you never know when you might need a quick exit.
Ventilation was another game-changer. My first setup had practically no airflow, and cooking would fog up all the windows! Now I use a combination of a 12V ceiling fan and mesh screens to keep air circulating. I even added a small dehumidifier after discovering how much moisture cooking generates in a tiny space.
Let me break down realistic costs based on my experience with multiple builds. You can create a functional kitchen on almost any budget:
Creating an efficient van kitchen isn’t about having the most expensive setup – it’s about thoughtful design that matches your cooking style and needs. Through years of trial and error, I’ve learned that the perfect van kitchen evolves through use. Start with the essentials, focus on workflow efficiency, and don’t be afraid to modify your design as you discover what works best for you.
Remember, a well-designed kitchen can transform your van life experience from surviving to thriving. I’d love to hear about your van kitchen experiences or answer any questions in the comments below!